Master the exposure triangle and improve your cat photography
When I first started taking photographs years ago, I quickly stumbled upon my limited knowledge I had about the relationship between the technical side (and variables) of a camera and the aesthetic results of a photograph.
I believe that every photographer should understand this relationship and realize that every technical decision he or she makes about camera settings also has an important aesthetic result and thus that those results can be controlled.
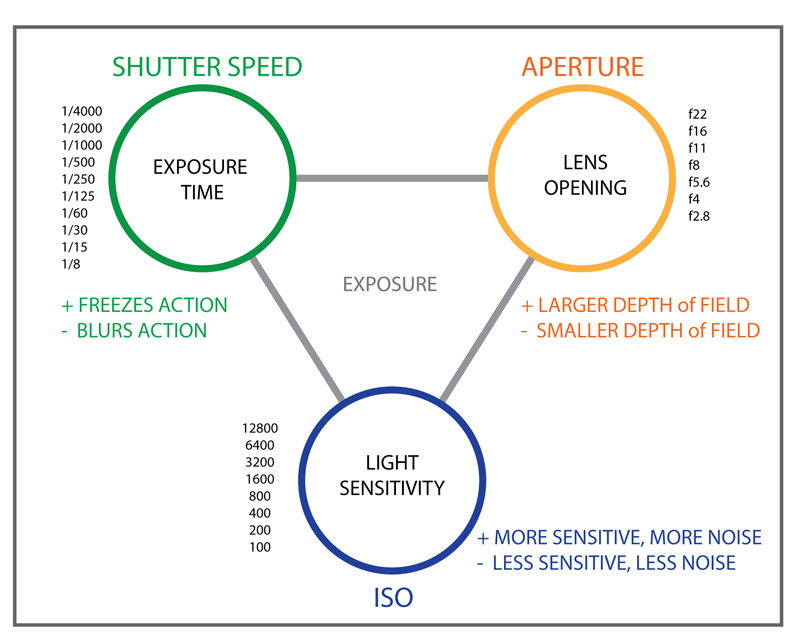
The choices you have to make as a cat photographer will get easier when you master the exposure triangle, because you’ll understand exactly what setting you’re choosing—and also what you’re giving up with that choice—with respect to the aesthetic of the image.
I have more detailed information about this in this free “Master the Exposure Triangle Guide” for you. >> So don’t forget to download it!
The exposure triangle is the relationship between the three elements that influence the exposure of a photograph: the ISO, the shutter speed and the aperture.
These three components work together to create a specific exposure for every photograph.
Mastering the exposure triangle isn’t hard. It takes a few minutes to read and understand the relationship of the three parameters and experiment with the effect on the aesthetic of the photograph. Mastering this will absolutely give you better control of your cat picture and will in the end lead to more amazing cat photographs.
So here is a link to download this free guide I created, what every cat photographer needs to know about the exposure triangle.
Different types of light
Hard light – Soft light
A point light source such as the sun creates hard-edged and very distinct shadows. So we consider the light on a sunny day as hard light.
On the other hand, a broad large light source, such as white clouds in the sky on a cloudy day, creates shadows that are barely visible. We call the light on a cloudy day soft light. It’s that simple and that complicated.
The further the light source is from the lighted object, the smaller the light source will get and the more it will become a small point light source. The sun is a perfect example of this: although massive in size, the sun is so far away from us here down on earth that it shows in the sky as a relatively small point light source.
A small light bulb at the ceiling of a room also produces hard light and hard shadows.
An electronic flash, either built into you camera or a separate flash to attach on top of the camera, is a relatively small point light source and will create hard shadows. Therefor it is called a hard light.
There are of course methods or techniques to soften the hard light. We can try to diffuse the hard light so it will no longer create these hard-edge shadows and the light will get a softer effect.
Diffused light
Bringing the light source closer to the lighted subject makes the light source, relatively to the subject larger, and as a consequence softer. But you realize that this is not always physically possible, e.g. the sun.
If we want to create a softer light with the sun a light source, we need to find circumstances or techniques where the sunlight is diffused, before it hits the subject.
On cloudy days, the white clouds function as an enormous natural diffuser of sunlight, like a massive light box, creating soft light.
We can make use of different types of diffusers to create a soft light source ourselves too.
An example of such a diffuser is a large white cloth. If we place this large white cloth between the light source (sun) and the subject. The large white cloth will get lit by the (small point) sunlight and will become a larger light source, closer to the subject and thus creating softer light on the subject.
Another example of diffused sunlight is via a large reflector, e.g. a large white wall. Let’s consider a situation where sunlight is hitting a large white wall and reflecting light on a subject, which is not placed in the shade (no direct sunlight), then this reflected light will have a soft light effect on the subject. The closer the reflector is towards the subject the softer the light will be.
Diffused light, whether occurring naturally or created from unnatural light sources, is a very effective and beautiful light for cat portraits.
Flash light
It is my personal opinion that when photographing cats it is best NOT to use flash directly towards your cat. For example with your IPhone flash or with the pop-up flash on a DSLR.
First of all it may scare your subject away, and often the aesthetic effect of a flash directly pointed at your subject is not pleasing at all.
Especially indoors, it produces most of the time a weird looking photo that is not flattering. It results very often in strange looking eyes, due to the reflection of the flashlight.
When taking pictures outdoors during the day, this is not such a big problem because there is plenty of light. Nevertheless, if there is plenty of light, I don’t always see the need to ad flashlight.
There is however one way that I do use flashlight when taking cat pictures. And that is when I use the flashlight to brighten up the scene with extra-diffused light.
As you know by now, a flashlight is a point light source. If you point a flash light towards the ceiling or towards a wall, you will turn the entire ceiling or wall into a large light source, reflecting the light on the subject.
Bouncing light off ceilings and walls is a quick and easy way to diffuse light from this type of light source. This action spreads the light before it falls onto your kitty and effectively turns a small light source into a larger one.
The use of a softbox around your flashlight to spread the light is also a possibility to create a diffused soft light but then we are evolving more to advanced and professional cat photography, and that is not who this article has been written for.
But as explained above, there is a way to use the flashlight to create a soft, flattering light such as on a cloudy day.
Ambient light (added light)
Ambient light is the existing light that is available in the environment where we are taking a photograph.
The term refers to any natural source of light illuminating a scene, also known as ‘Natural Light’.
Added light can be the light emitted from the flash or another unnatural light source.
How to use different light situations for beautiful cat photos
Beautiful high quality cat pictures are crisp and sharp. Good lighting is key to make these high quality pictures.
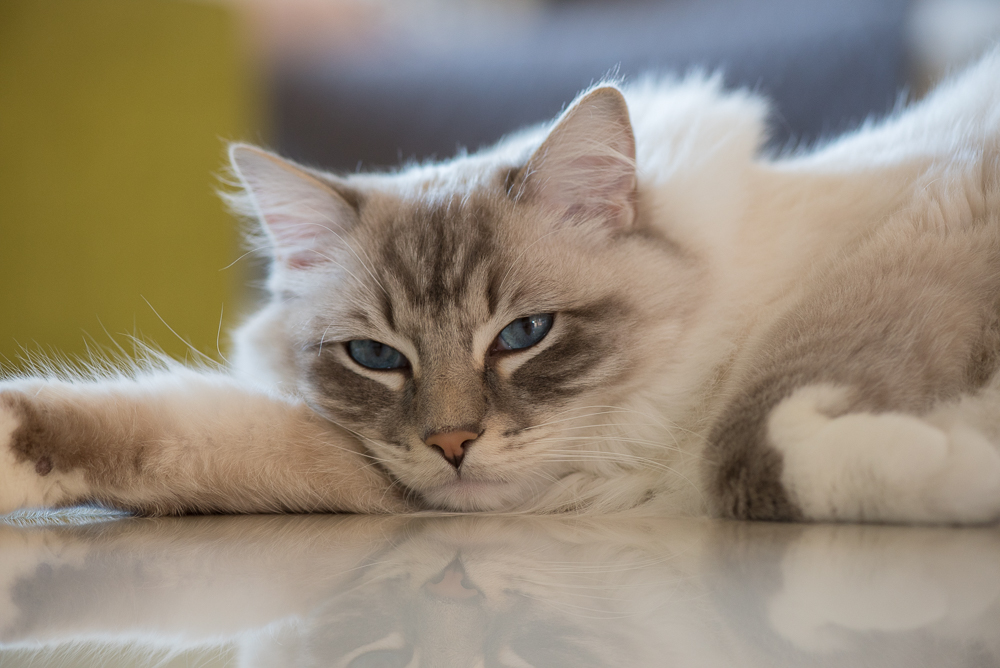
A sufficient amount of light will allow a low ISO camera setting and still have a high enough shutter speed to avoid blurry pictures. For taking pictures of my ragdoll Casper I prefer to work with a sufficient amount of ambient light.
Window light
I prefer to use the daylight coming through the windows when making cat pictures. This window light gives normally plenty of light, which allows me to create high quality pictures.
Remember that this light doesn’t have to be direct sunlight. I prefer soft light, unless I want to use direct sunlight to create a deliberate aesthetic effect.
The closer I put my subject, Ragdoll cat Casper, to the window, the more light will fall on my subject, which will help avoid blurry photos.
Windows aren’t to hard to find in a home and an advantage of using window light is that cats often love to sit on the window sills or near the window, to watch the birdies outside, which can make photographing cats near the window a lot easier.
Here are some extra tips to make window lighting even more beautiful.
- Translucent curtains will make the window light very soft, elegant, and flattering to both people and cats
- Windows with no shades or drapes can transmit light also very nicely, but there are many ways to use window hangings to expand the creative possibilities. For example, if you have Venetian blinds or vertical blinds, beautiful dappled light can be produced very easily. Look at your cat to see how the light changes as you make adjustments to the blinds.
- Depending on the weather, time of day, and time of year, the intensity, color, and overall look of the window light will also change.
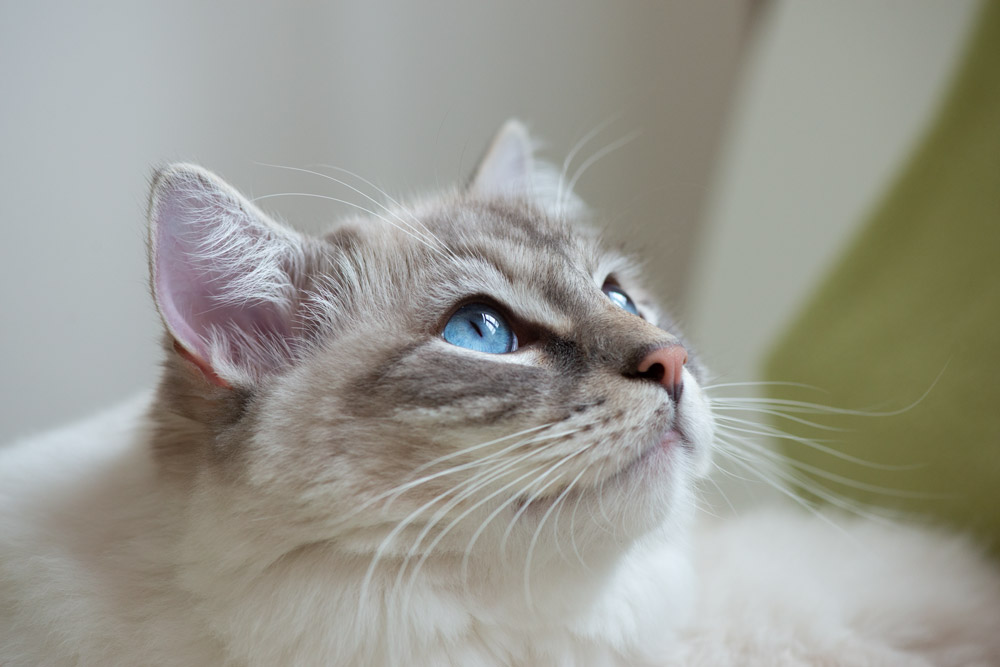
- One of the most beautiful things about window light is to use it in combination with close-up pictures. The window light will not only produce a beautiful light on the face of the cat, but it will produce also attractive catch lights in the eyes of the cat, adding this extra touch of quality to a cat photo.
Creating silhouettes using backlight
It is always interesting to have a good balanced variation between the type of cat pictures you have in your feed or in your portfolio.
And this is where the silhouette shot can definitely help, because silhouette photos can be very beautiful, captivating and dramatic at the same time.
To make a silhouette photo of my cat indoors, I am looking to make a picture composition with the window light directly behind my cat Casper.
Outdoors, I am just looking for a position, where the main light (usually the sun) is coming from behind the cat, it is not that hard to create such a silhouette picture.
The most beautiful and unique effect about backlighting is the “rim” of light that creates an outline around the cat’s fur. This kind of rim light is very attractive and pleasing to watch because it creates this a warm and cozy feeling.
Maybe you need to try multiple exposures to get the right aesthetic silhouette effect. It speaks for itself that you should never use a flash for a silhouette picture.
The best moments of the day to take these backlight pictures, is either early in the morning or late in the afternoon or evening, when the sun’s position is low. It is not difficult to understand that it’s easier to capture your cat with sunlight directly behind them at those specific moments.
Outdoor lighting situations – Sunlight, Clouds and Open Shade
As I explained in the part about hard and soft light, lots of people (not photographers) may think that a bright, sunny day with a clear, blue sky offers the best lighting for outdoor photos…
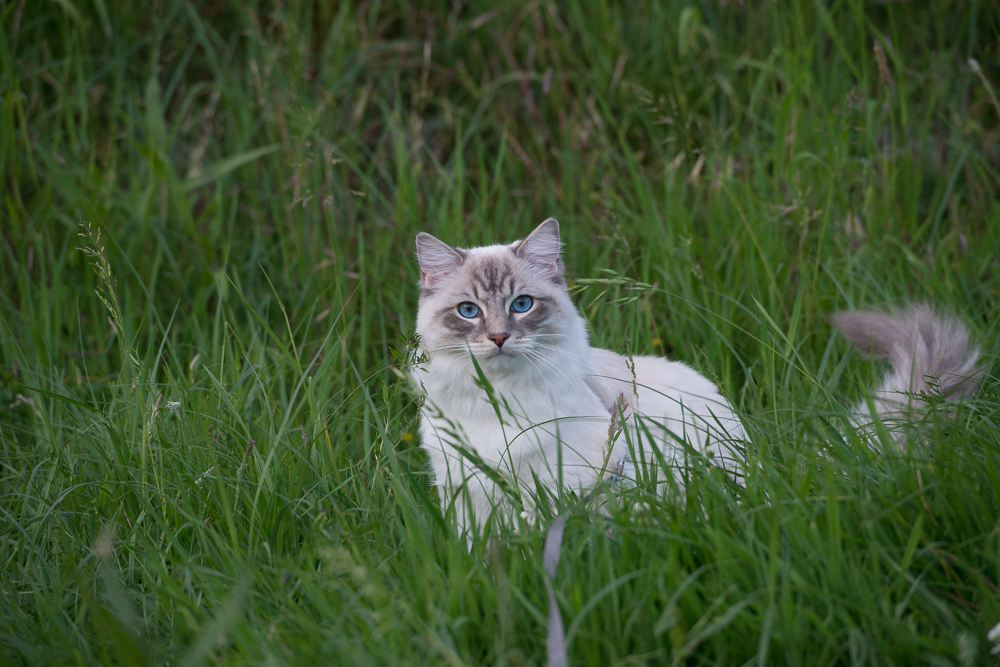
But I have explained that this hard light creates hard-edged shadows, especially on human faces. Maybe less on cat faces, but nevertheless, I prefer cloudy outdoor situations (overcast) for outdoor cat photography, creating soft light.
Overcast days with the sun behind the clouds, still producing enough of brightness, are a great source of naturally diffused light.
However there are some alternatives even on a bright sunny day: open shade spots. These are places, not in direct sunlight, where the subject is still nicely lit, with diffused light, for example reflected off any brightly lit area. When the cat is positioned along the edge of the shaded area, but not in the direct sunlight, you may notice beautiful diffused light bouncing off the grass, surrounding walls or buildings, and so on.
The trick with this kind of light is that the cat has to be in the shade but facing the direction of the light source.
So if you succeed in controlling your kitty to do all that, then this picture is surely a winner.
Low light situations
Sometimes, especially in darker rooms, darker days or close to nightfall, you may find that the quantity of the natural or ambient light isn’t enough to keep your shutter speed high enough, to avoid blurriness or to keep your ISO low enough, to avoid to much noise in the photo.
What can I do?
I always start with a reasonable ISO… but what is reasonable… that is completely depending on the quality of your camera’s sensor.
You will have to experiment with taking shots at different ISO levels and determine yourself from what ISO level the noise in the picture is becoming inacceptable.
So once I have determined the maximum ISO level I want to use, I still want the ISO level as low as possible. If I want to take a shot with only the available light in the room, and it is still quite dark, I will try to see if there are ways to bring more light into the room, especially on the spot where my cat will be photographed.
This isn’t always possible, but sometimes if I take the time and look around, there are maybe some elements blocking incoming light that I can change.
I can open all the doors, curtains, and blinds in that room to see if I can get to an ambient light level that is high enough.
In some cases I will even make the effort to place a reflecting object on the floor or against the wall to bounce additional light towards my cat I am photographing.
If I have tried all of this and my exposure still isn’t satisfactory, I may decide to add extra light to the scene by adding flashlight to light the scene. Remember that I will have the flashlight bounce off a wall or object and not light uo the cat directly.
Is this is too hard, or not your thing?
Then move to a different location with more natural light or wait until the light situation is better at another moment of the day.
I often have the patience to wait till the light situation is better to make Casper’s pictures. This is of course possible if you are taking pictures of your own cat.
My thought process about the “right” light before taking a picture
I believe that “light makes or breaks a photograph”.
So choosing the right light or waiting for the right light for your cat photography is an essential element to create the amazing cat pictures we all want to take.
Here are the questions I often ask myself when I want to take a new cat picture:
- Is my cat Casper in the mood for cat photography?
- Is the picture that I am about to take, different form the ones that I have already?
- What type of light currently exists in the location where he is sitting, lying or chilling?
- Do I like the quality of light (direct light, open shade, diffused, soft,…) in that location?
- Is there enough light that allows camera settings resulting in the aesthetic pictures that I want to make (depth of field and shutter speed)?
- Do I want or need to change something about the natural light? Do I need to diffuse it, add to it, or modify it in some way to change the quality or quantity?
- Do I have the time to set something up now? Does my cat has the patience to stay on that location?
- Or will I just wait until the situation improves to make that perfect cat picture?
I always look for light that draws my attention.
If you have a great composition at a great location, the picture will not be amazing unless you also have good light!
I hope this short guide about the importance of understanding light in cat photography will help you to detect good light. I hope it will also help you make better decisions in regard to camera settings and choosing locations for your cat photography to improve the quality of your cat photos so you will amaze your friends and family.
Here are some other interesting articles
Here are some of my most popular pages or blogposts, I am sure you will find them useful and interesting too:
- How to improve your cat photography dramatically – Easy tips and tricks
- 9 Ultimate tips you need for sharp cat Photos with Your iPhone
Or another great place to get you started is on our START HERE page.


